Creating a new ‘post’.
1) Log into wordpress with the credentials supplied
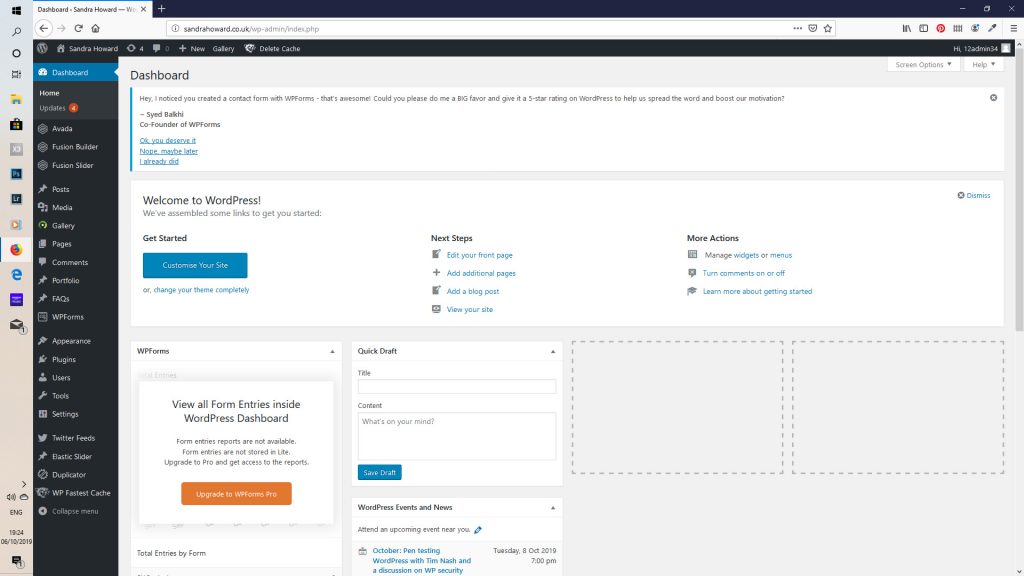
2) This will take you to the dashboard (below)
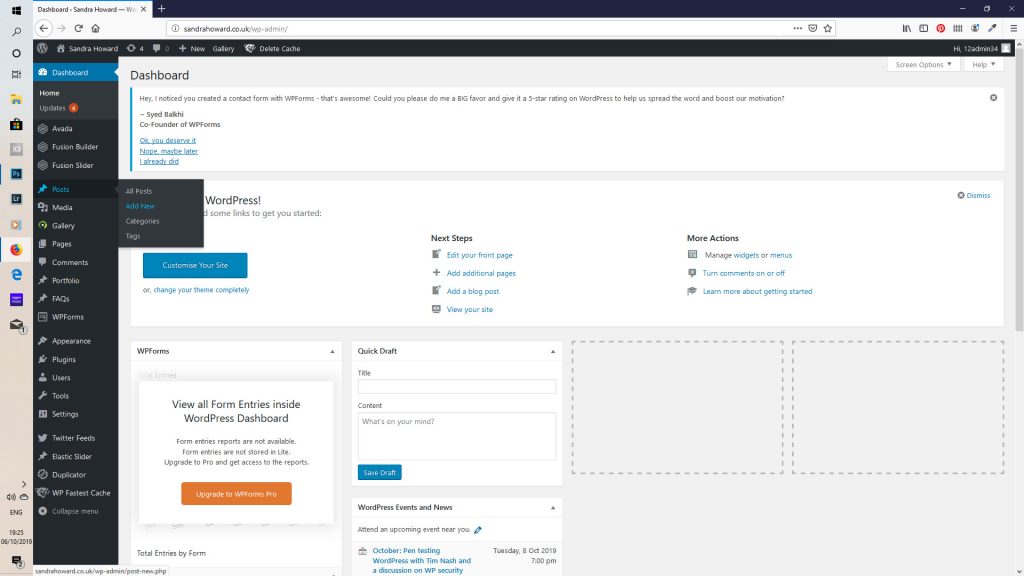
3) Hover over the word posts in the left hand menu and click ‘Add new’
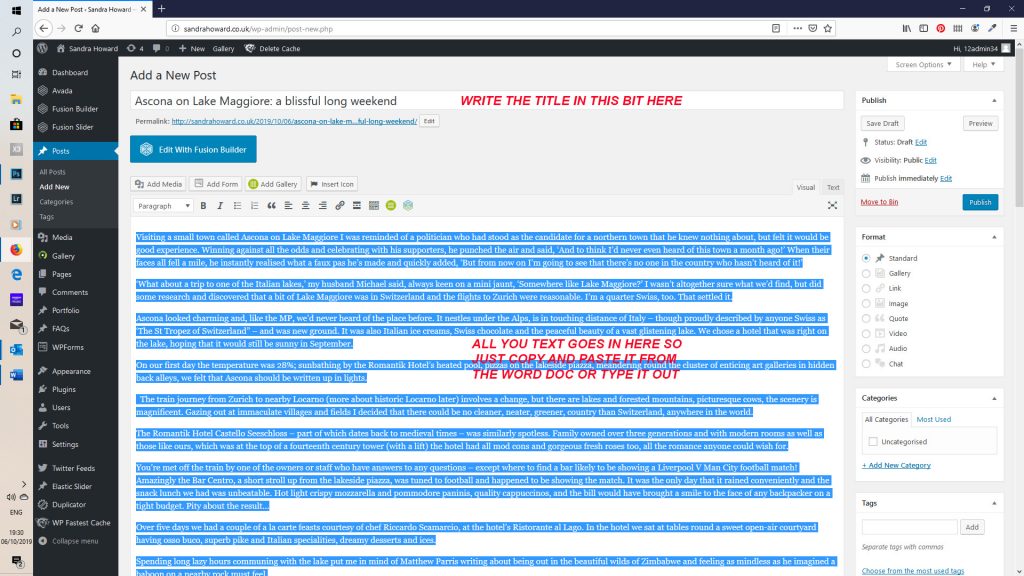
4) Add the title of your post in the box at the top, then copy and paste your text into the large box
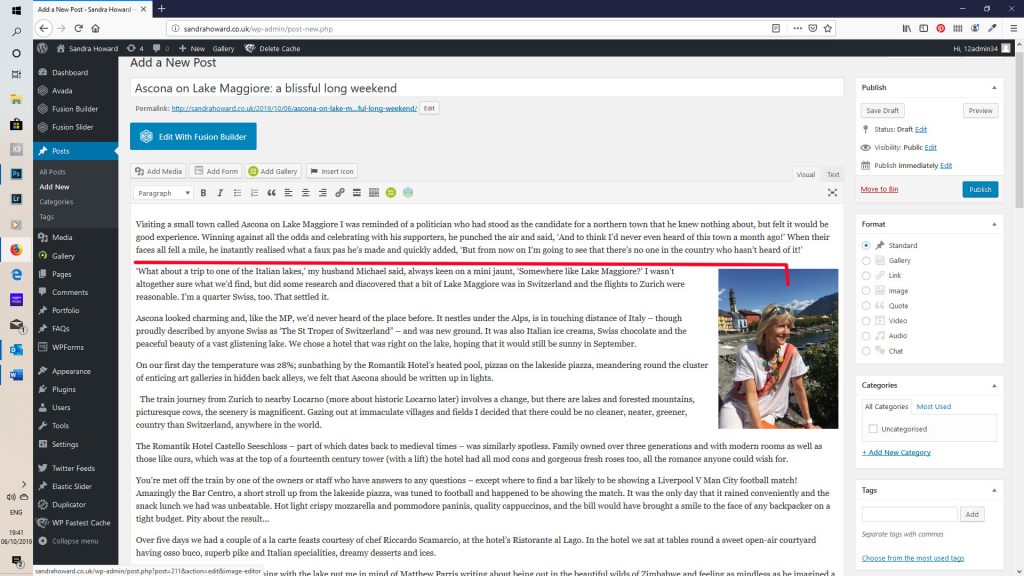
5) Next bit is adding an image. This may take a bit of trial and error and getting your head around!
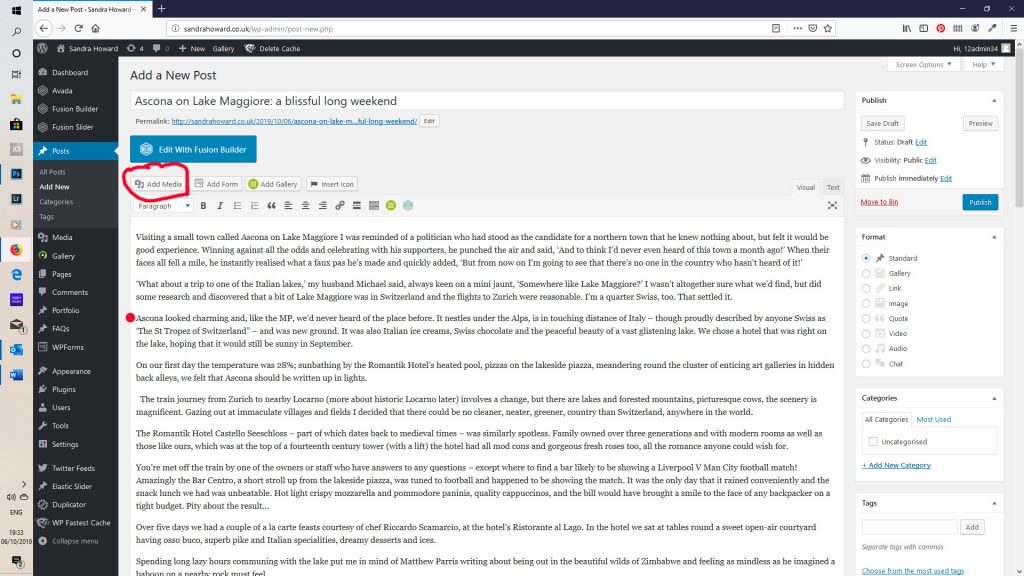
You’ll probably want the image on the right hand side of the page, but to get it there you’re going to click the start of a paragraph. This will be where the top of the image is. See where the red dot is, that’s the position i’ve chosen (all will become apparent in a minute!)
Once your cursor is clicked and flashing at the beginning of the paragraph, click the ‘add media’ button
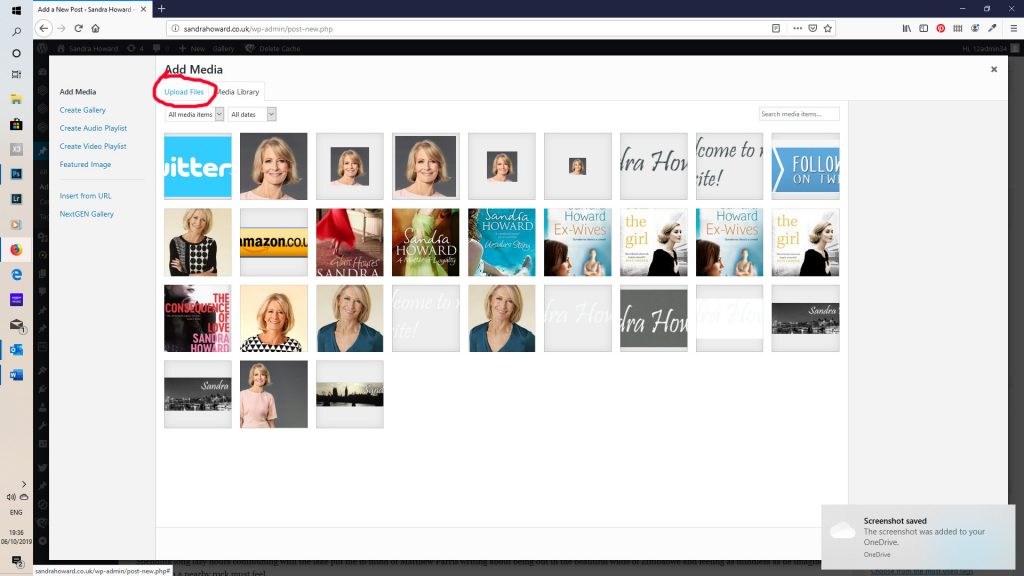
6) This will bring up a list of thumbnails of all the images that are saved on the server. It’s likely as it is a new post that the image you want hasn’t been uploaded yet, so click the ‘upload files’ button.
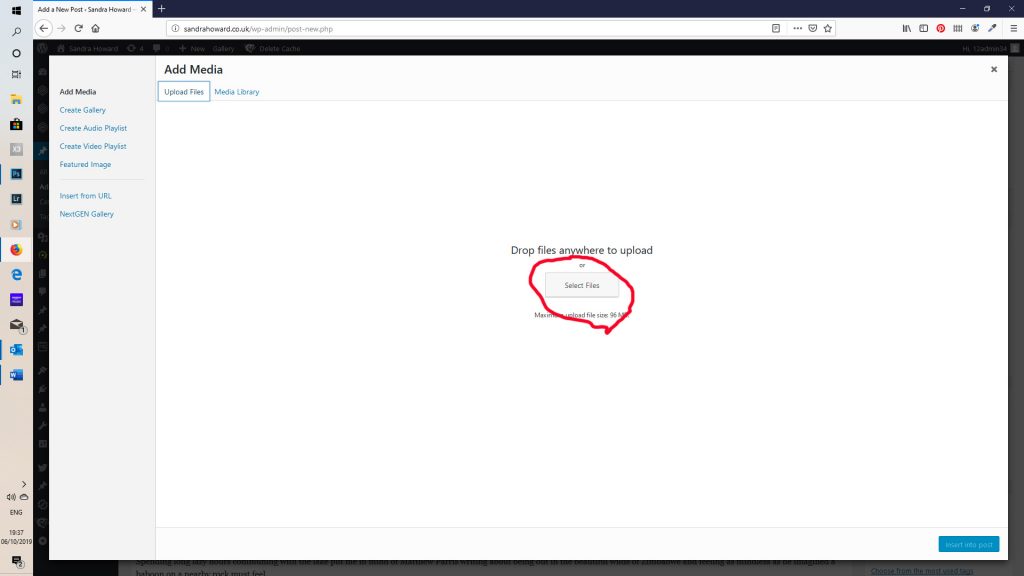
7) Next, this box will pop up. You can either drag and drop files into the screen, or press the ‘select files’ button to open up a file upload box. Choose the file from your pc and hit the upload button (or just double click the file)
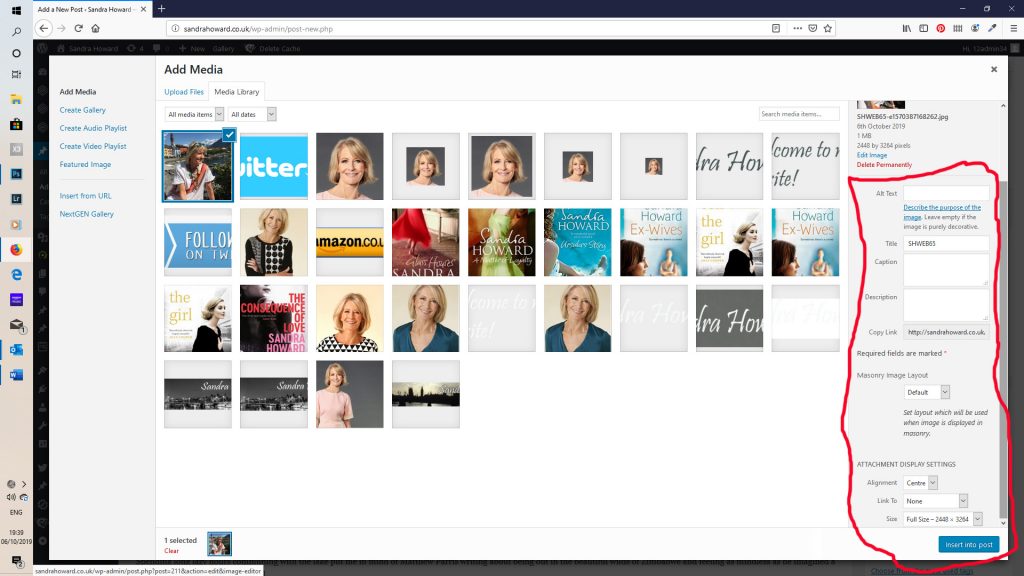
8) As you can see below, the first pic in the thumbnails is the one that has just been uploaded. Also, it is selected as there is a blue box round it, and a blue tick. That means that is the file you’re working with.
If you look at the badly drawn red rectangle below, everything to the right of the page concerns the image selected. You can add an alternative text (alt text), description etc. You don’t have to, but can be handly for those who are maybe partially sighted or use a screen reader to read the screen.
The important bit is the bits at the bottom. Alignment sets the position on the page (left, centre or right), and the size is the size of the image. Usually i would set the size to medium. Just click the drop down boxes and select where you want it to go.
When done, click insert into post.
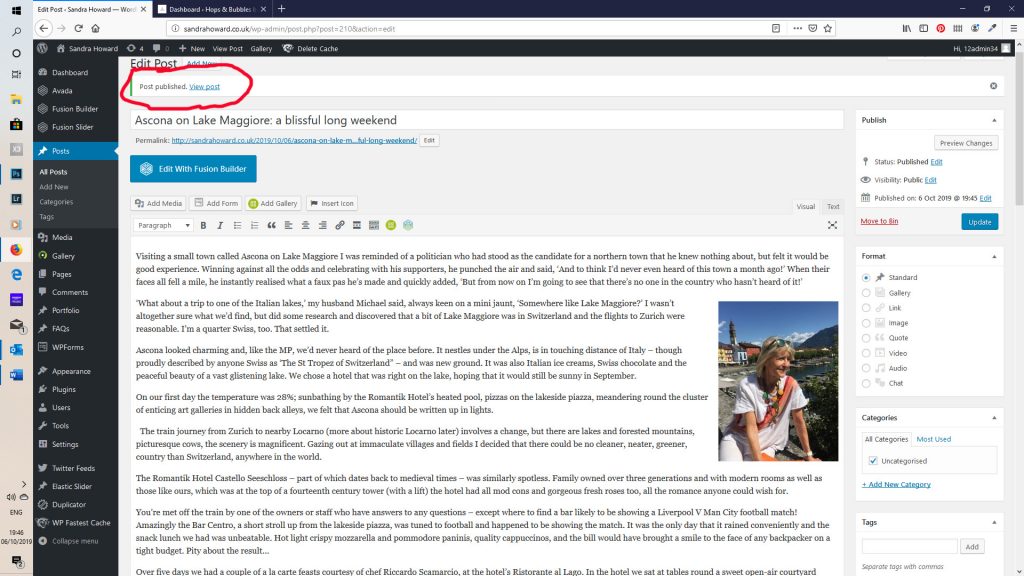
9) As you can see, the image has gone in vertically where we placed the cursor (think i may have put the dot in the wrong place on the other screenshot!), and it is set to the right of the text.
To save it and make it live, press the ‘publish’ button on the right side of the page
10) Wait for it to publish and you will see the ‘post published’ box pop up.
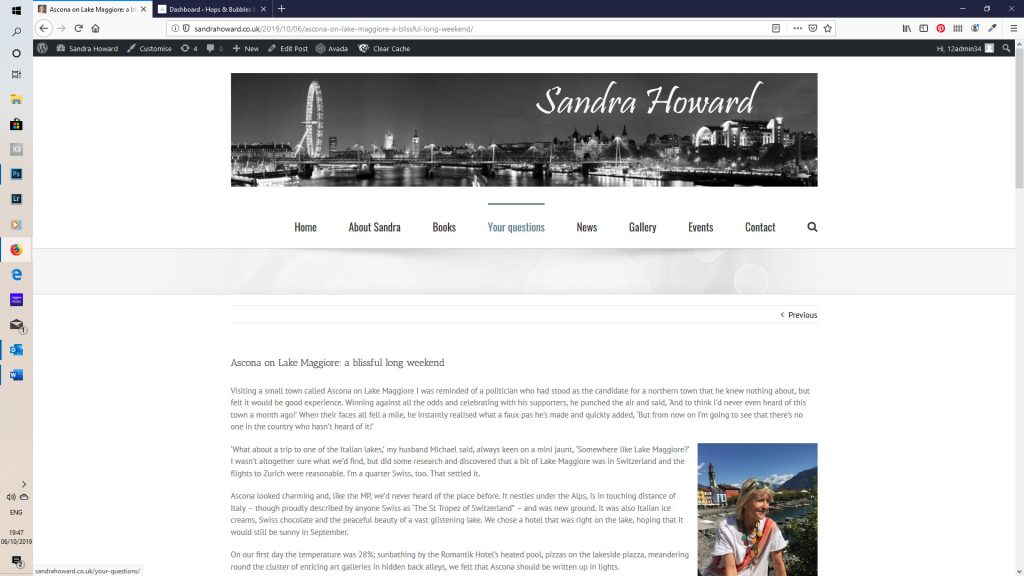
Click on the ‘view post’ button and you’ll see how it looks on the web.
11) And that’s about it! If you want to change something, just hit the edit post button just above the site banner.
Loads of other bits you can do, but that should get you going for now!